This guide gives a complete tactical breakdown of Farm Town: how to unlock and access it, the highest-value loot areas, reliable spawn & boss info, optimal routes and rotations, map-specific hazards, and advanced high-risk/high-reward tactics. It’s written for both new players who are unlocking Farm Town for the first time and veterans who want repeatable, profitable runs.
Quick note: Farm Town is a late-game map with a steep difficulty spike and some of the best loot in the game — treat it like a surgical raid zone.
How to unlock and reach Farm Town
There are multiple methods to unlock and reach Farm Town depending on your progression and which game systems you’ve unlocked. The common path: progress through the earlier maps, activate the in-map beacons/teleport progress, and use explosives or ferry/transport methods (some guides report using two dynamite charges to breach certain rock barriers or buying a ferry ticket to progress to dock/ferry points). Once unlocked, Farm Town becomes available as a much larger region than earlier maps. Plan to use your base teleporters or ferry access for repeat runs.
What Farm Town is like (map character & risk profile)
- Map type: Large semi-urban + agricultural map — a mix of clustered villages, a central supermarket/market district, barns, and industrial mines/labs in farther reaches.
- Risk: High. Multiple named bosses, roaming elite squads, and dangerous environmental encounters (e.g., poison squads) create frequent high-intensity fights. Many community reports note a significant difficulty spike compared to earlier maps.
- Reward: Very high — Farm Town contains some of the best mid-to-endgame loot, unique quest items, and access cards used for even deeper areas (labs, mines), which makes it ideal for key farming and blueprint hunting.
Key landmarks and why they matter
- Supermarket / Market District (central) — Hotspot for boss Vida (when he spawns) and dense close-quarters loot (food, medkits, small safes). Expect close corridors, lots of cover, and chaotic boss fights if Vida is present. Clear aisles methodically; don’t tunnel-vision.
- Dorms / Village Clusters — Clothing spawns (jackets/backpacks), cabinets, and pocket loot. Primary key-farming zones — quick sweeps can net several keys and small valuables.
- Barns & Farm Workshops — Workbenches, toolboxes, vehicle crates; good source of crafting components and attachment parts.
- Mines / Lab Outposts (edge of map) — High-tier loot and special key/card spawns that can open deeper sections (lab access cards). These are high-risk areas that often host powerful AI or named spawns. Consider these only when your squad is prepared.
- Ferry / Dock (access point) — If your progression uses a ferry ticket system, this becomes a repeated access/extract point. Keep awareness of NPC patrols near the dock.
Notable bosses & behavior
- Vida (Supermarket boss): Reported to spawn inside the supermarket and fight inside the aisles. Vida is a close-quarters, high-damage boss; when he appears, the supermarket becomes a lethal arena. If you’re in a squad, assign one or two players to clear aisles systematically while others hold choke points.
- Mine / Lab bosses: Several card-related bosses or elite spawns guard key areas that drop lab access cards (Blue / Red / Green / Yellow / Black variants used for deeper map progression). These bosses can drop specific cards randomly or as quest rewards — they’re prime targets for progression runs. Community reports discuss multiple methods to acquire cards (boss drops, specific spawn desks/locations, or vendor sales).
- Roaming elite patrols & “Fly Squad” type enemies: Some patrols use poison or fast melee attacks that ignore low-tier armor; they’re dangerous to solo players and will often force retreats. Treat such squads as high priority to avoid being kited into worse positions.
Loot priorities — what to search first
- Clothing & pockets (jackets/backpacks): Highest chance for keys, small high-value items, and quest fragments. Sweep these quickly on any house/dorm run.
- Supermarket tills & back-rooms: Meds, food, occasional rare drops — but be careful: supermarket is often a boss zone.
- Toolboxes & workbenches in barns/garages: Crafting parts and attachments. Essential for mid-game crafting and upgrades.
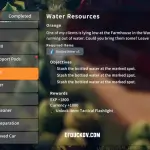
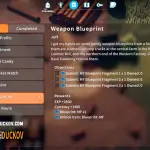
- Safes, lockers & desk drawers in offices/mines: Require keys or lockpicks but yield blueprints, cards and rare gear. Only open if you have the space and a plan to extract with the loot.
Recommended rotations & route planning
Play style dictates rotation. Below are tested approaches.
Solo / cautious player rotation (loot-efficient)
- Spawn/arrive → clear nearest village cluster (jackets/backpacks).
- Sweep barns and farm workshops for toolboxes and workbenches.
- Hit peripheral shops and the market outskirts (avoid the supermarket center unless you’re confident).
- Extract via nearest dock or preset safe extract; don’t engage deep lab/mines solo unless you’re geared.
Key-farming rotation (fast loops)
- Quick sweep of dorms and houses for clothing.
- Fast check of supermarket backrooms and tills.
- Hit 1–2 barns and tool sheds (time permitting).
- Extract early; repeat short runs.
Map-specific hazards and mechanics
- Close-quarters chokepoints: Supermarkets, dorm corridors, and lab hallways favor grenades and breaching tactics — always pre-throw before entering tight rooms.
- Poison/melee squads: Some enemy types apply sustained damage that bypasses light armor; these require either ranged focus fire or tactical avoidance.
- Card/access mechanics: Certain high-value rooms require lab cards (blue/red/yellow/green/black). Cards are rarer than normal keys and may be acquired by boss drops, specific scripted spawns, or merchant sales — plan runs around the chance of card acquisition, and don’t waste time when you haven’t rolled the spawn.
Advanced tactics (high-ROI plays)
- Split-and-clear supermarket tactic: Two teams move aisle-by-aisle; one team breaches and clears with flash/grenade, the second locks doors and watches entry/exit to prevent flanks. This reduces crossfire and isolates Vida when he spawns.
- Card banking: If you pick up a lab card, prioritize extracting immediately or passing it to a teammate who can stash it safely. Cards are mission-critical and losing one to death costs a lot of progression time.
- Use the environment as funnel traps: Narrow dorm hallways and barn doors make ideal points to bounce grenades and funnel enemies into predictable patterns.
- Dog/demis helper focus: If a boss has protections (dogs/helpers), eliminate those first to reduce damage and control the engagement flow.
FAQ — quick answers players ask most
Q: How do I get to Farm Town?
A: Progress through earlier map objectives and unlocks; many players use beacon/teleport progression or ferry tickets and sometimes explosives to open new access routes (varies by game progression).
Q: Is Farm Town worth it for solo players?
A: Yes — but with caution. Farm Town gives exceptional loot but contains lethal boss spawns and elite patrols. Solo players should favor key-farming and peripheral loot routes over deep lab runs.
Q: Where does the supermarket boss spawn?
A: Vida is tied to the supermarket area and, when present, will make the supermarket a boss arena. If the supermarket has no boss this run, it’s usually safe to loot quickly.
Q: How do lab access cards work?
A: Cards (Blue/Red/Green/Yellow/Black) unlock specific lab doors and are often rare drops from bosses, spawn in certain rooms, or may be sold by special merchants. Plan runs around the realistic chance of finding one.
Q: What loadout should I take?
A: Bring a reliable mid-to-long-range rifle for open approaches and a compact close-quarters weapon (SMG/shotgun) for supermarket/dorm fights. Pack multiple medkits, a gas mask if you will poke toxic/mined areas, several grenades, and a keycase to carry multiple keys/cards.
Q: How dangerous are the “fly squads” and elite patrols?
A: Very — they can apply status effects or close heavy damage quickly. Treat them like roaming mini-bosses: avoid isolation, use stuns/flashbangs and focus fire.
Final tactical conclusion — what to focus on
Farm Town is a high-value, high-danger environment. Your priorities per run should be:
- Define a clear objective: keys/cards, supermarket clear, lab push, or general loot sweep.
- Pack for the objective: explosives, medkits, grenades, keycase, gas mask as needed.
- Respect the supermarket: if Vida is present, treat the building like an arena — coordinate, control choke points, and don’t get flanked.
- Bank rare items fast: cards and unique drops should be exfiltrated immediately or passed to a teammate for safekeeping.
- Repeat short runs for keys: if you need keys/cards more than random weapons, shorten runs and prioritize clothing/dorms.
When executed properly, Farm Town yields a steady stream of high-tier loot and progression items that accelerate your mid-to-late game. But remember: the map punishes overconfidence. Move like a team, clear methodically, and withdraw when the odds swing against you.