Pato Chapo is one of the first major area bosses players encounter in Escape from Duckov. He’s a tough, memorable fight that both tests your combat fundamentals and rewards careful preparation. This guide explains where Pato Chapo appears, what he and his entourage carry, how to beat him reliably, and why fighting him is worth the effort.
Quick facts
- Location: Ground Zero — Road Camp / industrial zone.
- Encounter: Pato Chapo appears with three mercenary guards (heavy-hitting AI) and often with armored enemies nearby.
- Notable equipment on the boss/guards: armor level 3 and high-rate-of-fire weapons (RPK/SMG-class); expect mid-to-high tier rifle/ammo drops.
- Rewards/quest tie-in: Defeating Pato Chapo is the main objective for the “Duck Hunt: Pato Chapo” quest and usually yields generous XP, currency, and unlock items (weapon unlocks reported).
- Achievement: Killing Pato Chapo is linked to the “Overlord of Ground Zero” achievement.
Where to find Pato Chapo – spawn & context
Pato Chapo spawns in Ground Zero, typically in the Road Camp / industrial section of the map where mercenary camps cluster. This is a hot area with high loot but also increased enemy density and tougher patrols, so expect extra resistance while approaching the boss zone.
Tip: If you’re not ready to fight, scout the approach routes and mark cover positions before committing — Pato Chapo’s entourage can easily overwhelm an unprepared player.
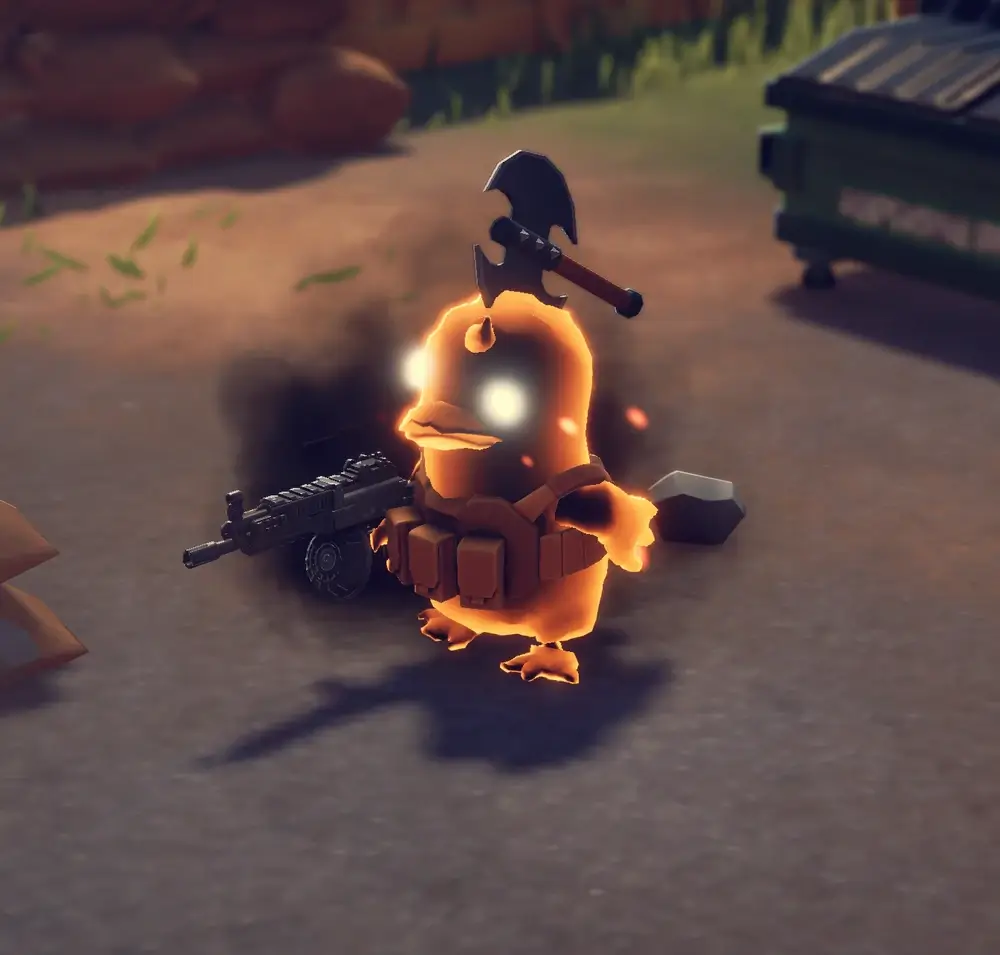
What Pato Chapo brings to the fight – gear & entourage
- Mercenary guards: Pato Chapo is commonly accompanied by three mercenaries who are aggressive and well-armed; they serve to split your attention and punish reckless plays.
- Armor & weapons: Expect Armor Lv3 on some enemies and high fire-rate weapons (RPK/SMG-style) among his guards. The boss fight favors mid-range and close-range engagements if you let the mercs close the distance.
- Drops: Boss and surrounding containers often drop higher-tier gear — body armor, weapon parts, upgraded guns, and occasionally unique unlock items that tie into quests. Fighting him is one of the fastest ways to upgrade your loadout early.
Important: the specific loot pool can vary based on RNG, but the overall value of a successful Pato Chapo run is consistently high.
The fight: behavior, phases, and what to expect
Behavior & combat rhythm
- High DPS output: Pato Chapo and his mercs often output sustained, high rates of fire. Getting hit repeatedly is a major danger, so positional awareness and movement are crucial.
- Crowd pressure: The mercenaries are designed to force engagement at multiple angles. If you focus only on the boss, the guards will flank or suppress you.
- Stamina & mobility factors: Expect fights in which stamina management (dashes/sprints) and the ability to kite matter — the boss arena/environment gives openings to reset and heal if used smartly.
Common phases
- Initial contact: Clear or isolate the guards first if possible — they make the fight chaotic.
- Boss focus: Once the guards are down, burn Pato Chapo quickly with controlled bursts and headshots.
- Recovery window: After big attack patterns, you’ll often get a small window to heal or reposition — don’t waste it.
Best loadouts & prep (beginner → veteran)
Beginner-friendly (safe & reliable)
- Primary: Mid-range assault rifle (stable recoil, AP rounds if available) — helps against armor.
- Secondary: Shotgun or SMG for close quarters (if mobility is limited).
- Armor: Level 2–3 body armor (higher armor reduces time-to-die against his DPS).
- Consumables: First-aid kits, painkillers, and stamina-restoring items.
- Tactic: Use cover and pop out for controlled headshots. Focus on guards first.
Veteran / speed-run (high risk, high reward)
- Primary: High-DPS automatic rifle or marksman rifle with high-penetration ammo for one-shot headshots.
- Secondary: Fast reload sidearm and throwable (grenade) for cluster damage.
- Tactic: Use hit-and-run, bait the boss into a narrow choke, or burst the boss once guards are distracted.
Loadout priority: Armor → reliable primary weapon → heals — in that order for consistent success.
Loot & rewards (why you fight Pato Chapo)
Typical rewards for defeating Pato Chapo:
- XP and currency — significant for early progression.
- High-tier weapons or weapon upgrades — players commonly report looting upgraded AKs, Vector/MF-class weapons, and armor pieces after the encounter.
- Quest unlocks / progression: Completing the “Duck Hunt: Pato Chapo” quest often provides quest rewards and can unlock other weapons or quest chains (weapon unlocks such as SKS-45 reported in guides).
Pro tip: If your goal is gear progression, bring carrying capacity (or make a quick extraction route plan) — the best loot is only useful if you can extract with it.
Quests & achievements related to Pato Chapo
- Quest: Duck Hunt: Pato Chapo — objective: kill Pato Chapo (reward: XP, currency, weapon unlocks reported). This quest is often tied to mid-game progression in Ground Zero.
- Achievement: “Overlord of Ground Zero” — awarded for defeating Pato Chapo; repeatable variations and secondary achievements may also reference multiple kills.
Farming and repeat strategies
If you plan to farm Pato Chapo for gear and XP:
- Clear approach routes to minimize surprises.
- Bring an efficient, cost-effective loadout (weapons you don’t mind losing or repairing).
- Learn respawn behavior (boss/encampment respawn windows can vary); once you know the cadence, you can plan runs to maximize time-to-loot ratio.
Common mistakes to avoid
- Rushing the boss without clearing the guards. The mercenary trio will overwhelm you fast.
- Underestimating armor: If you bring low-penetration ammo, fights last far longer and increase exposure risk.
- Not planning an extraction route: Loot-heavy runs require planning — carrying too much gear without a clear exit makes you an easy target.
Quick strategy checklist
- Prepare: Level 2–3 armor, first-aid kits, and an assault rifle with AP or high-pen rounds.
- Approach: Use flank routes, scout with your binoculars/peek, and clear minions first.
- Fight: Focus bursts on the boss’s head after the guards are down. Use cover and heal in short windows.
- Extract: Don’t overstay — run to the nearest extraction beacon once you’ve looted high-value items.
FAQ
No – but he is the objective for specific Ground Zero quests and provides strong rewards, making him a major optional milestone.
A reliable assault rifle with high-penetration rounds for armored targets; switch to a marksman rifle if you can secure headshots consistently.
Not necessarily – good tactics, cover usage, and clearing the guards are often more important than top-tier gear for the first few successful kills.
Skilled players can solo if prepared; beginners should clear surrounding mercs and extract quickly after victory.
Conclusion
Pato Chapo is a pivotal early/ mid-game boss in Ground Zero who rewards players with meaningful progression loot and quest completion bonuses. He’s challenging because of high DPS, armored guards, and crowd pressure, but with the right prep—Level 2–3 armor, a solid assault rifle, tactical clearing of mercenaries, and a plan to extract—you can reliably defeat him and profit handsomely. For players looking to push progression quickly, mastering Pato Chapo is one of the best early investments of time.